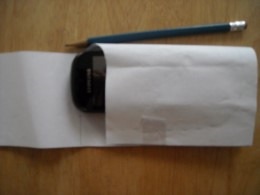
A leather cell phone or iPhone case is a very practical leatherworking project that is also fairly easy to make. This leather craft project is easier than the leather knife sheath project and will show you how to make a cell phone case, but still gives good practice in cutting, wet-molding and stitching needed for future, more difficult projects. To make this cell phone case, you will need paper for a pattern, needles, waxed thread or artificial sinew, utility knife or other cutting instrument, some way to punch or drill through the leather, glue, and leather. This will be a one-piece wrap-around cell phone case, made from one piece of leather. The top will be folded backwards to make the belt loop and the right side will fold over the cell phone to make the pouch.
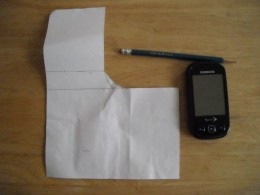
1) Make a pattern similar to than shown in Picture 1 on paper, based on the size and shape of your cell phone. You can just try to draw it out on leather if you would prefer, but if you are wrong, that is an awfully expensive mistake!
2) Cut the pattern out in the leather. You can either trace the outline of the pattern on the leather and then cut it out, or use small pins to attach the paper pattern to the leather and cut it out.
3) Now its time to wet-mold the leather to the cell phone. Get the leather wet, either by holding it under the faucet for a minute or two or by putting it into a container of water and letting it soak for a few minutes. Wrap your phone is a layer of plastic wrap or something to prevent it from getting wet. Once the leather is wet enough, lay the phone on the leather back section and wrap the front piece around the phone to make a good fit. Start molding the front section tightly to the contours of the phone. Make sure that the edges are tight and meet the back as closely as possible to the phone. Also, fold over the belt loop to the desired position and work it until it stays in place. Keep working on it until the leather dries out a little and it holds the shape of the phone even when you remove it. Let it dry for at least a couple of hours, overnight if you aren’t in a hurry. The excess leather on the edge can be cut off now if desired or you can wait until you stitch the case together if you would prefer.
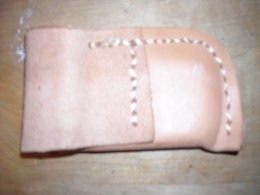
4) Once the leather has dried adequately, glue or cement the lower edge of the belt loop to the back of the case, leaving enough room for a belt to slide through easily. Mark the desired positions for the stitching by using a groover, calipers, a compass, or any other way that can mark a line keeping a constant distance from the edge of the piece. The stitching locations should run in a pattern, such as a square, diamond, triangle, or something similar. As you can see in Picture 3, I made this one quickly and just ran a line of stitching across the bottom of the loop and then later tied it in with the main stitching on the body of the case. This worked all right, but would have been more secure with a better stitching pattern.
5) Drill or punch the holes where the stitching should go with a ice pick, leather awl, punch, drill or dremel tool. Stitch the belt loop to the back of the case where you have located the holes. Use the saddle stitch to stitch it – most of the other stitches do not hold adequately well for hard use. I use the saddle stitch for everything.
5) Glue the front edge to the back and clamp or weight the edge down until it dries adequately.
6) Determine where you want to put the line of stitching on the case, which will probably be as close to the wet-molded section as possible. Just like for the belt loop, create a visible line of some sort to show where the stitching should run. Once you have this line, mark where the holes should go along it. A leather spacing tool is best, but a small nail, fork, or anything that can make an impression will work. The idea is make sure that the mark for each hole is a constant distance from the next, so that your stitching will look good.
7) This is the last main step – you are going to stitch the case together. Drill or punch through the leather where you have marked the holes. A thin ice pick is one of the best choices as is a good thin awl. Now sew the edge with a saddle stitch, starting at the bottom and stitching toward the top. Once you reach the top, sew back down a couple of holes to lock the stitching in place.
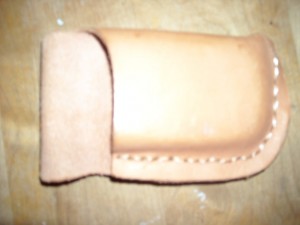
Now that the case is made, you can finish it off if you want. You can dye it, seal it, and burnish the edges. The project might sound complicated, but it is really pretty simple. The cell phone case in the picture is not completed quite yet. I haven’t finished it off and made if fancy yet, but I plan to do so in the future. I gave this case to my Dad, because he needed something right away. It will be prettier in the future, Lordwilling!
If you can do this pretty well, try the leather knife sheath – you shouldn’t have any problem with it. Have fun with it! If anyone would like something explained or if I wasn’t clear on something, please let me know and I will do my best to help.


